Home » Food & Wine

Food & Wine

Turkey Black Bean & Chickpea Chili Recipe

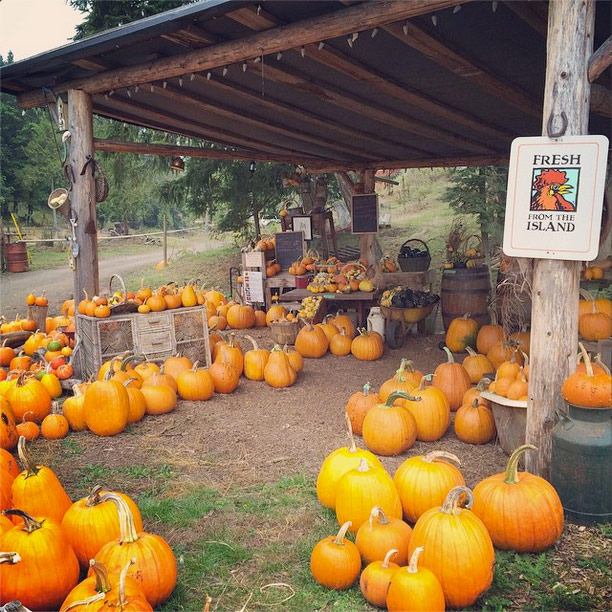
Fall is in full swing here on Vancouver Island, which means it’s time to pull out the crockpot or the Instant Pot and cook up some delicious comfort foods!

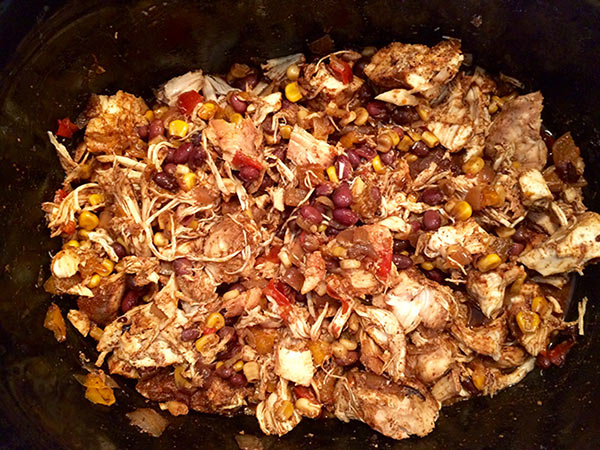
Turkey black bean chili is one of my favorite things to cook up in a big batch, so we can eat it for a few days and have easy meals. After rummaging through my fridge, freezer and pantry, I found everything I need for a good crockpot turkey black bean and chickpea chili.

I made this up as I went along, so my ingredients are approximate (if you’re someone who measures perfectly, you can relax on this one, haha!)

Recipe Details

Prep time: 20 minutes
Cooking time in a crockpot: 8 hours on low
Cooking time in an Instant Pot: pressure cook for 20 minutes on the soup/chili setting

Shopping List / Ingredients

  • 2 lbs ground turkey – I used 2 of the ground turkey packages from Costco
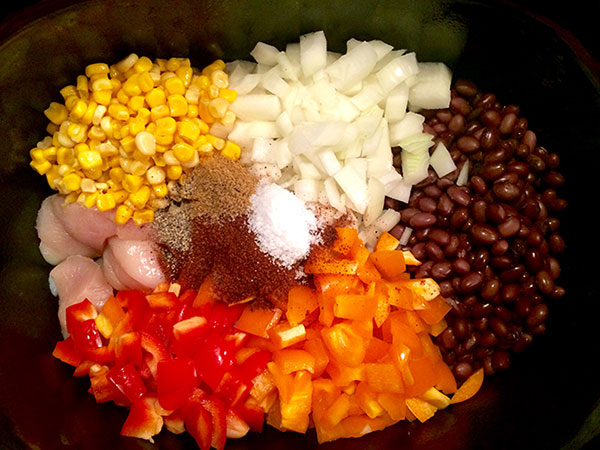
  • 1 medium onion – chopped
  • 3 carrots – chopped
  • 3 ribs of celery – chopped
  • 1 red pepper – chopped (orange and yellow peppers would be good too)
  • 2 cloves of garlic – minced
  • 2 cans black beans – drained and rinsed
  • 1 can chickpeas – drained and rinsed
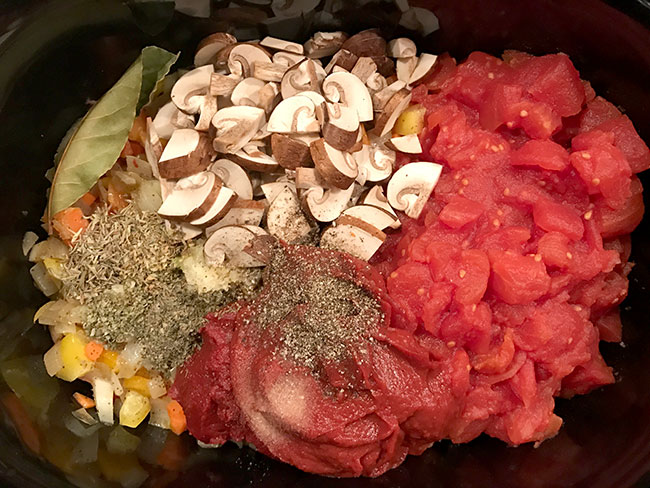
  • 1 can diced tomatoes – no sugar added
  • 1 can tomato paste
  • 2 tsp dried oregano
  • 2 tsp ground cumin
  • 2 tbsp chili powder (If your chili is super spicy, you may want to use less)
  • 1 tbsp cocoa (my secret ingredient)
  • 1/2 tsp salt (or to taste)
  • 1/4 tsp pepper (or to taste)
  • Fresh cilantro (optional garnish) – chopped
  • 1 glob of sour cream (optional) – added to each serving when plating, if desired
  • Grated cheddar (optional) – added to each serving when plating, if desired

How to Make Turkey Black Bean Chili

  1. Heat 1 tbsp olive oil in a large skillet over medium/high heat.
  2. Add ground turkey. Cook until the meat is browned (4-5 minutes), making sure to crumble the meat as it cooks.
  3. Drain excess fat and transfer to slow cooker.
  4. Discard the excess fat and add remaining 1 tbsp of olive oil to the skillet.
  5. Add vegetables to the skillet and cook until the onions are soft (about 3 minutes). This process helps release the flavours from the veggies before adding them to the slow cooker. Transfer to slow cooker.
  6. Add diced tomatoes, black beans, white kidney beans, and tomato paste to slow cooker.
  7. Add oregano, cumin, chili powder, salt and pepper to slow cooker.
  8. Cook in crockpot on LOW for 8 hours or on HIGH for 4 hours.
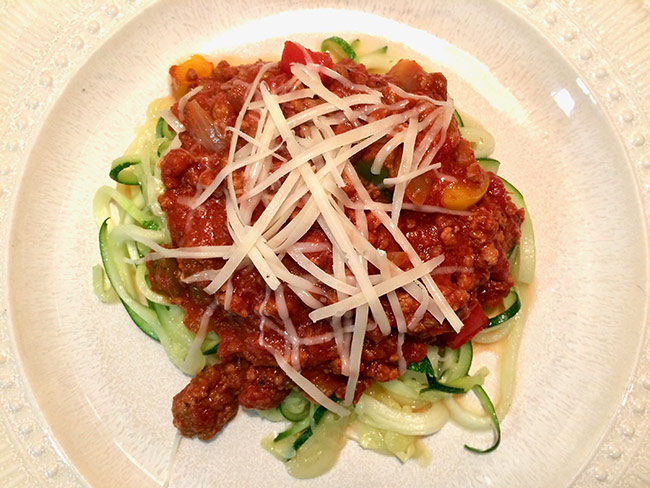
  9. To serve, add a glob of sour cream, some shredded cheddar, and chopped cilantro to each bowl.

NOTE: If cooking in the Instant Pot, use the saute setting to saute the ground meat until browned, then saute all other ingredients together. Once all ingredients have been added, secure the lid, and cook for 20 minutes on high pressure on the chili setting.

Enjoy!

Please comment and share, if you enjoy this recipe!


Recipe: Gluten Free Banana Protein Pancakes

Me and my sweet tooth LOVE pancakes! But gluten is a problem for me, so I found this flourless banana pancake recipe and I’m OBSESSED!

They are super easy to make with only 3 ingredients, and they have a serving of protein, carbs and fruit to help you get your day started right!

Recipe Details: Prep time: 5 minutes Cooking time: 5-8 minutes

Shopping List:

  • 1½ large bananas, ripe to overripe (200g; 7 oz)
  • 2 eggs
  • 1 teaspoon baking powder
  • Maple syrup, butter, or fruit of choice, to serve

Flourless Banana Pancakes - Ingredients

Directions to make your gluten free protein pancakes:

  1. In a mixing bowl, crack the eggs and add in baking powder. Whisk or beat with a fork to combine.
  2. In another bowl add in 1½ large bananas. Lightly mash with a fork or potato masher, but not too much. There should be chunks of bananas to make fluffy pancakes. And use only ripe bananas.

    Flourless Banana Pancakes -  Mashing Bananas

    Flourless Banana Pancakes -  Mashed Bananas

  3. Pour egg mixture into mashed bananas and stir to combine.
  4. Heat a frying pan to medium high heat and add a bit of butter or oil so the pancakes won’t stick.
  5. 2 tablespoons of batter is enough for each mini pancake.
  6. When the baking powder is activated, flip it over and cook for about one minute more.
  7. Serve immediately, when hot, and add maple syrup and your fruit of choice for added deliciousness!
  8. ENJOY! 

Gluten Free Banana Protein Pancakes

Delicious Slow Cooker Pasta Sauce Recipe

One of my favorite comfort foods is pasta. And although I have a gluten sensitivity, I still love to get my spaghetti or lasagne on every once in a while, but I use a great trick to avoid the gluten as well as the carbohydrates in pasta, and level up on the healthiness factor of this meal.

I kinda made this recipe up as I went, and it turned out pretty darn good, so I thought it was worth sharing. 🙂

Recipe Details

Prep time: 20 minutes
Cooking time: 8 hours on low in your crock pot
Serving size: 1 – 1.5 cups

Shopping List / Ingredients

  • 2 tbsp olive oil
  • 1 pound ground beef (or ground turkey for a leaner protein)
  • 1 onion – chopped
  • 2 cloves of garlic – minced
  • 1 red pepper
  • 1 yellow pepper (I also used a piece of orange pepper that I had left over in the fridge)
  • 2 carrots – chopped
  • 2 stalks of celery – chopped
  • A handful of mushrooms – chopped
  • 2 cans tomato paste – try to use one that has the least number of added ingredients.
    • The Italissima brand (in the photo) contains only tomatoes and salt.
  • 1 can diced tomatoes
  • 2 bay leaves
  • 1 tsp dried oregano
  • 1 tsp dried thyme
  • 1 tsp dried basil
  • 1 tsp dried marjoram
  • Salt & Pepper to taste

Slow Cooker Pasta Sauce Ingredients
Directions

  1. Heat 1 tbsp olive oil in a large skillet over medium/high heat. Add ground beef (or turkey). Cook until the meat is browned (4-5 minutes), making sure to crumble the meat as it cooks. Drain excess fat and transfer to slow cooker.* This process helps melt off excess fat and water from the meat, which helps make it healthier before transferring it to the slow cooker.
  2. Get rid of the excess fat and add remaining 1 tbsp of olive oil to the skillet. Add vegetables to the skillet and cook until the onions are soft (about 3 minutes). This process helps release the flavours from the veggies before adding them to the slow cooker. Transfer to slow cooker.
  3. Add tomato paste, diced tomatoes, and herbs and seasoning to the slow cooker and mix well.pasta-sauce-ingredients-in-slow-cooker
  4. Place the lid on the slow cooker and cook for 8 hours on LOW.
  5. Stir well and serve with your choice of pasta or zoodles.

Enjoy!

Pasta Sauce on Zoodles

Pasta Sauce on Zoodles (zucchini noodles)

Recipe: Crockpot Cilantro Lime Chicken

I’m always on the lookout for easy, healthy and delicious meals to add to my rotation and in the winter months that often involves my crockpot!

This was my first try with this cilantro chicken recipe, and it turned out awesome!

Cilantro Lime Chicken with Corn and Black Beans - Cooked!

Recipe Details:

Prep Time: 15 minutes
Crockpot Cooking Time: 6-8 hours on Low OR 5-6 hours on High
Serving Size: 1 cup
Serves 6-8

Cilantro Lime Chicken with Corn and Black Beans - Ingredients

Shopping List / Ingredients: 

  • 2 pounds boneless skinless chicken, thighs or breast
    (I find that chicken thighs don’t dry out as much as the breast in the slow cooker)
  • 1 cup corn
  • 1, 15-ounce can black beans
  • 1 orange bell pepper, diced
  • 1 yellow bell pepper, diced
  • 1 onion, diced
  • Juice from 2 limes
  • 2 tablespoons chili powder
  • 1 teaspoon salt
  • 1 teaspoon cumin
  • 1/2 teaspoon black pepper
  • 1 teaspoon Siracha sauce (optional, if you like it spicy)
  • 2 tablespoons fresh chopped cilantro

Directions: 

To eat it today: Combine all ingredients except cilantro in the slow cooker and cook it on low for 6-8 hours or on high for 5-6 hours.

To prepare for the freezer:  Chop up all the ingredients (except cilantro) and place them into a ziploc bag and freeze it for an easy meal option at a later date.

When you’re ready to cook it, take it out of the freezer, run warm water over the bag to separate it from the frozen food, and place frozen ingredients in the slow cooker. Cook on low for 6-8 hours or on high for 5-6 hours.

Cilantro Lime Chicken with Corn and Black Beans

How to Serve Cilantro Lime Chicken:  

Stir in 2 tablespoons fresh chopped cilantro before serving.

Add to tacos, burritos, taco salad, nachos, or make burrito bowls with it. Or just add it to your meals as a side dish. It’s very flexible.

In the photo below I’ve made huevos rancheros with my crockpot cilantro lime chicken for breakfast – DELICIOUS!

Cilantro Lime Chicken with Corn and Black Beans - Huevos Rancheros

Do you have a crockpot recipe to share? Post it in the comments below!

Recipe: Apple Butternut Squash Soup

I’m a HUGE soup lover, so I thought I would give this delicious looking apple butternut squash soup a try with the surplus of apples I picked from my parents’ trees. I had a fairly small butternut squash to work with, so I cut the recipe in half – an average squash should be fine with the full ingredient amounts.

Apple Butternut Squash Soup Recipe

Apple Butternut Squash Soup Recipe

Total Time: 1 hr.
Prep Time: 15 min.
Cooking Time: 50 min.
Equipment: Blender, large saucepan
Yield: 8 servings

Shopping List:

  • 4 lbs. butternut squash
  • 2 Tbsp. olive oil
  • 1 medium onion, chopped
  • 5 medium apples, peeled and chopped
    (Tip: Use the apples of your choice, a more sour apple will help reduce sweetness of the soup.)
  • 4 cups low-sodium organic chicken broth
  • 1 thin slice fresh ginger, peeled, finely chopped
    (Tip: I keep my ginger in the freezer, it helps it last longer and makes it super easy to cut into very thin slices.)
  • ¼ tsp. ground nutmeg
  • 1 cup nonfat milk
    (Tip: if you are lactose intolerant, use plant based milk instead.)
  • 1 tsp. sea salt
  • 1 tsp. ground white pepper
  • Optional: Cilantro to garnish

Directions:

  1. Preheat oven to 400° F.
  2. Cut butternut squash in half lengthwise and remove the seeds.
    Apple Butternut Squash Soup Recipe - Squash cut in half
  3. Cover squash halves with foil and place them on a baking pan cut sides up. Bake until tender (about 45-50 minutes). Set aside.
    Apple Butternut Squash Soup Recipe - foiled butternut squash
  4. While your squash is in the oven, add oil in large saucepan over medium-high heat.
  5. Add chopped onion; cook, stirring frequently until tender (maybe 3-4 minutes).
  6. Add apples, broth, ginger, and nutmeg and bring to a boil. Reduce heat to a simmer, stirring occasionally until apples are tender (about 10 minutes). Remove from heat.
  7. Pour the apple mixture into the blender (in batches, if necessary). Blend until smooth. Return apple mixture to saucepan.
    Apple Butternut Squash Soup Recipe - Blended apple mixture
  8. Take the squash out of the oven and scoop the flesh out into the blender, add milk (or almond milk in my case) and blend until smooth.
    Apple Butternut Squash Soup Recipe - baked squashApple Butternut Squash Soup Recipe - Blended squash
  9. Add blended squash to the apple mixture in the saucepan and add salt, and pepper. Bring to a gentle boil over low heat, stirring frequently.
  10. Remove from heat and serve. Garnish with fresh apple chunks and cilantro.

Apple Butternut Squash Soup

If you liked this apple butternut squash soup recipe, share the love with a pin, a like, a pic or a comment below!

Recipe: The Best Healthy Apple Crisp

I have to admit, I was a bit skeptical about this apple crisp recipe when I first read about it – mostly because there is no butter or no sugar in it. But I thought, “Hey! I have a TON of apples, so I may as well give it a shot.”

Well let me tell you, I am pleasantly surprised by what I pulled out of the oven last night! So here, as promised, is the recipe.

Apple Crisp - 21 Day Fix Approved

Healthy Apple Crisp

Recipe Details:

Prep Time: 28 minutes
Cooking Time: 30 minutes (approx.)
Serving Size: 1 cup

Shopping List: 

  • Your favourite apples (enough to make 4 cups, peeled and sliced)
  • 3 tbsp maple syrup
  • 1 tsp ground cinnamon
  • 1/4 cup old fashioned rolled oats
  • 1/4 finely chopped (or crushed up) pecans and/or walnuts

Directions:

  1. Pre-heat the oven to 375F.
  2. Peel and slice up 4 cups of apples.
    (I had a leftover peach that needed to be used up, so those are the orange bits you see in the photo below.)
  3. In a medium baking dish; combine the apples with 2 tbsp maple syrup and 1/2 tsp cinnamon and mix well.
    Apple Crisp Recipe - 21 Day Fix Approved
  4. In a bowl, combine oats, nuts, 1 tbsp maple syrup, 1/2 tsp cinnamon and mix well.Apple Crisp Recipe - 21 Day Fix Approved
  5. Top the apple mixture with the oat mixture in the baking dish.
    Apple Crisp Recipe - 21 Day Fix Approved
  6. Bake 25-30 minutes or until the apples are soft.
  7. Clean up. There’s not a whole lot of mess…

Cleanup from apple crisp recipe

Enjoy your fresh, delicious, 21 Day Fix approved apple crisp with a cup of tea or coffee! (In the photo: Earl Grey de la Creme black tea from Steeped Tea With Jenn)

Apple Crisp with Earl Grey del la Creme Tea

Bonus Vanilla Shake Recipe

Apple Pie Shakeology Recipe
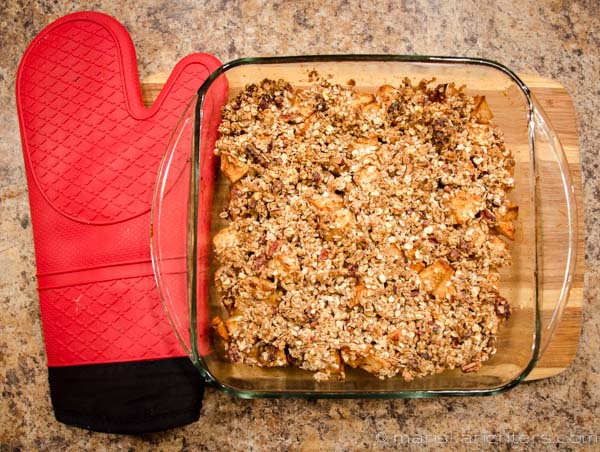
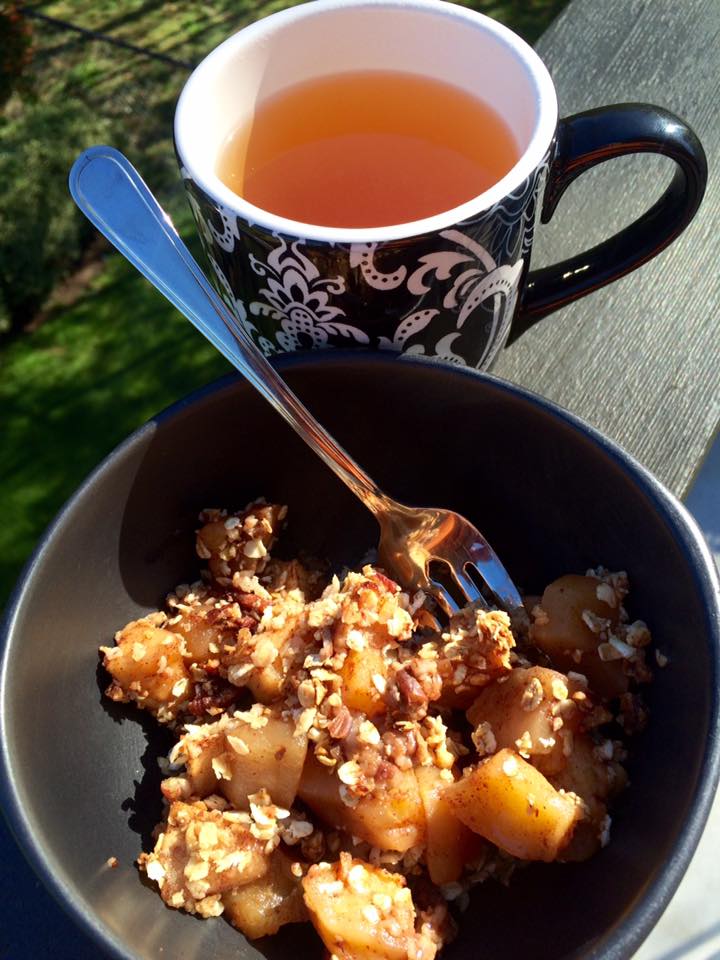
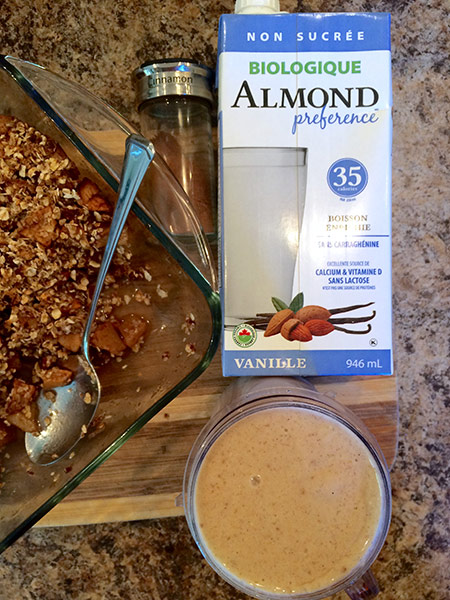
This morning, as I was making Adam’s vanilla shake, I wondered how good it might be with some of the apple crisp blended into it.

Um, Hello Apple Pie with Vanilla Ice Cream!

Apple Pie Shake Recipe:

Blend together:

  • 1/2 cup apple crisp
  • 1/2 tsp cinnamon
  • 1 scoop your favorite Vanilla Shake Powder
  • 1 cup almond milk (unsweetened)
  • Ice (optional)

Did you like this recipe? Share the love with a pin, a like, a pic or a comment below!

10 Reasons Why You Should Eat More Avocado

Avocado has got to be one of my favorite fruits. I include it in my meals nearly everyday. I put it on salads, in smoothies, spread it on toast, put it on sandwiches, add it to wraps, or just eat it right out of the skin with a spoon!

But not only is avocado delicious, it’s also very good for you. If you don’t already include avocado in your regular diet, this list of health benefits might convince you to start adding it to your regular menu.

Why You Should Eat More Avocado

10 Reasons Why You Should Eat More Avocado:

  1.  Avocado Can Lower Cholesterol – The oleic acid in avocados helps to reduce cholesterol levels.
  2. Avocados are Loaded With Antioxidants – Antioxidants help prevent disease and have even been touted to help against cancer and Alzheimer disease.
  3. Eating Avocados May Help You Lose Weight – Avocado has been known to be a hunger-squasher – the fiber and healthy fats make you feel fuller for longer.
  4. Avocados Provide Healthy Fats – Not all fat is bad for you. Avocados are packed with monounsaturated fat, which it where you get most of your calories from the avocado. Monounsaturated fat helps lessen you LDL cholesterol, which is harmful to your body.
  5. Avocados Are Good For Your Heart – Avocados help with the absorption of carotenoids (beta-carotene and lycopene), which are essential for heart health. They are virtually the only fruit that contains monounsaturated fat, making them a heart-healthy diet choice.
  6. Avocados Are Packed With Vitamins – You will find vitamins B, K and E in avocados. Vitamin B helps you maintain a healthy skin tone and metabolism, vitamin K is instrumental in bone growth and density, while vitamin E is key for strong immunity and healthy skin and eyes.
  7. Avocados Are High in Fiber – Avocados provide 37% of the daily recommended amount of fiber. They contain both soluble and insoluble fiber. Soluble fiber helps you with appetite control by making you feel full, while insoluble fiber is great for cleaning out you bowels.avocado selection
  8. Avocados Are Great During Pregnancy – On top of all the other benefits of avocados, they have been known to help with morning sickness and also help your baby’s brain and tissues grow. Plus, if you’re having trouble gaining weight during pregnancy, they are a great food to load up on thanks to the healthy fats.
  9. Avocados Are Potassium Rich – Avocados contain more potassium than bananas! Potassium helps lower blood pressure and is something that most people don’t get enough of in their diets, putting them at risk of stroke and heart problems.
  10. Avocados are DELICIOUS! – Seriously! If none of the above convinced you to add more avocados to your diet, maybe the deliciousness will! They are rich and fresh and squishy in your mouth and fit in with almost any meal.

How To Choose the Right Avocado

Avocados only ripen after they have been picked, this is why you will find that most stores and markets will have mostly hard, green avocados available in their produce section.

Because of this, you will most likely not be eating your avocado on the day you bring it home from the store. Leave it on the counter at room temperature (not in the fridge) until it ripens. You’ll know it’s ripe by the color – it will change to dark green, almost black – and becomes soft when you gently squeeze it. One trick that has been known to help an avocado ripen faster is to put it in a paper bag with a banana and place it in a dark cupboard. Try it and let me know how it goes in the comments.

 What’s your favorite way to eat more avocado?

Pumpkins at Abby Lane Farm

As I drove home from the gym one morning last week I decided to take a new route and was pleasantly surprised by the beautiful fall colors at the Abby Lane Farm Stand. As I came around the corner I was faced with hundreds of pumpkins in all shapes and sizes.

Abby Lane Farm - Sign Abby Lane Farm - Sign

There were pumpkins in buckets, in bathtubs, pumpkins in wheelbarrows, pumpkins in the back of a truck, pumpkins on tables, pumpkins under tables, pumpkins on chairs, pumpkins in barrels, pumpkins on shelves, and pumpkins strewn all over the grass.

There were regular pumpkins, warted pumpkins, gourds, acorn squash, hubbard squash (warted green, red and blue), kabocha squash, buttercup squash, and spaghetti squash. I had never seen so many different varieties of squash and pumpkins all in one place!

Abby Lane Farm - Pumpkins Abby Lane Farm - Pumpkins Abby Lane Farm - Pumpkins Abby Lane Farm - Pumpkins Abby Lane Farm - Squash

About Abby Lane Farm

Abby Lane Farm consists of 56 acres of rich farmland located at 7233 Mays Road in Duncan, BC and has been owned by the same family since the 1960’s. In 1982, the farm was named after a combination of the family dog (Abby) and the Beatles song, Penny Lane, to become Abby Lane Farm. The farm was mostly used for cattle and growing hay over the years but in 2007 they started growing pumpkins. The largest pumpkin that they’ve grown to date weighed in at 1,689 lbs! 

Abby Lane Farmers pride themselves on following organic farming practices with absolutely zero pesticides and herbicides used on the farm.

With Thanksgiving and Halloween happening this month, it’s the perfect time to head out to Abby Lane Farm for a horse wagon ride and to choose your perfect pumpkin! Be sure to visit a bank machine before you go, as they are a cash only farm stand. And please leave Fido at home, there are no dogs allowed at Abby Lane Farm.

No dogs allowed at Abby Lane Farm.

How to Roast Pumpkin Seeds

When you get your pumpkin home, try roasting the seeds for a nice healthy snack.

  • Remove the seeds from the pumpkin cavity
  • Wipe them off with a paper towel if needed to remove excess pulp that may have stuck to them
  • Spread them out evenly on a paper bag and let them dry out overnight
  • Place them in a single layer on a cookie sheet and light roast them in a 160-170ºF (about 75ºC) oven for 15-20 minutes *Roasting them for a short time at a low temperature helps to preserve their healthy oils.
  • After letting them cool down, sprinkle them with salt, or cinnamon sugar.

Enjoy! 

How To Get To Abby Lane Farm

The Creamery at Cheese Pointe Farm – The Savour Cowichan Festival

This past weekend marked the beginning of the Savour Cowichan Festival in Vancouver Island’s beautiful Cowichan Valley. With 40 artisan food and beverage producers participating it will be an incredible 10 days of  tastings and special events in the Cowichan Valley. Savour Cowichan runs from September 26 to October 5, 2014, be sure to check it out!

After visiting Cherry Point Estate Wines, we moved on to the Creamery at Cheese Pointe Farm.

Cheese Point Farm

The Creamery at Cheese Point Farm

Anybody who knows me knows that I am a huge fan of cheese. And wine tastes best when accompanied by cheese. So naturally after visiting Cherry Point Vineyard, our next stop was the Creamery at Cheese Pointe Farm.

Cheese Pointe Farm is family run by Hilary and Patty Abbott and features handcrafted cheese, artisan local treats and cheese tours.

I just loved the artwork on their signage and the sign at the driveway made me giggle,

“Drive Slow, we have lots of animals and a deaf cat.”

Cheese Point Farm

Unfortunately the cheese maker was away at the local Farmer’s Market, so we were unable to take a tour of the cheese making process, but I’ll be sure to go back soon to check that out. We did get a chance to sample some of the delicious local cheeses: camembert, blue cheese, squeaky cheese curds and a selection of flavoured cream cheeses. They were all simply delicious, the camembert was my favourite!

Cheese Point Farm Cheese Point FarmCheese Point Farm Cheese Point Farm Cheese Point Farm Cheese Point Farm Cheese Point Farm

Not only was the cheese delicious, the Cheese Pointe Farm itself was lovely.

Cheese Point Farm Cheese Point Farm Cheese Point Farm

Cheese Pointe Farm is located at 1282 Cherry Point Road in Cowichan Bay, BC. They are openFriday to Sunday 11am to 5pm. Follow The Creamery at Cheese Pointe Farm on Facebook.

What’s your favourite cheese?


Update: We’ve been notified that the farm at the Creamery at Cheese Pointe has been sold and will no longer be making cheese at this location. The nearest option would be Hilary’s Cheese in Cowichan Bay.

Cherry Point Estate Winery – Savour Cowichan

This past weekend marked the beginning of the Savour Cowichan Festival in Vancouver Island’s beautiful Cowichan Valley. With 40 artisan food and beverage producers participating it will be an incredible 10 days of  tastings and special events in the Cowichan Valley. The event runs from September 26 to October 5, 2014.

This past weekend I had the pleasure of visiting some of the participants, one of which was Cherry Point Estate Winery.

Cherry Point Estate Winery – About the Winery

Cherry Point Estate Winery is located in Cobble Hill, BC on Cherry Point Road (see map below). Tours are available year round but must be booked at least 48 hours in advance, and take about 45 min to complete. The tasting room is open every day from 10am to 5pm giving you an opportunity to sample their award winning wines.

Cherry Point Vineyard

Cherry Point Estate Winery – Savour Cowichan

Cherry Point Vineyard and the Amuse Bistro served Spanish Paella and Sangria to celebrate the wine and culinary festival to thank the community for their continuous support. After indulging in a wine tastings by the wine maker (the whites were my favourite), we sat and enjoyed our paella and sangria on the beautiful garden patio followed by a wander through the vineyard to sample some juicy grapes. (shhh!)

Cherry Point Vineyard Cherry Point Vineyard - Wine Maker

Cherry Point Vineyard - WinesCherry Point Vineyard

Cherry Point Estate Winery – The Wines

2009 Pinot Noir

2009 Pinot Noir

Cherry Point Wines - Pinot NoirSweetness: 0
Price: $24.00

This 2009 Pinot Noir is produced from a single vineyard block that was carefully tended to during the spring to ensure early ripeness. This wine was aged in old oak barrels for 10 months and has big cherry aromas with hints of raspberry and undertones of clean cedar. A silky mouth-feel is brimming with cherry, strawberry and raspberry flavour notes. A perfect wine to pair with smoked salmon, roast beef or any favourite west coast dinner.

2009 Coastal Red

2009 Coastal Red

Cherry Point Wines - Coastal Red 2009Silver Medal, North West Summit Competition
Sweetness: 0
Price: $16.95

A delicious blend with aromas of orange blossom, wild blackberry and spice. Juicy dark cherry and black current flavor notes with a kiss of oak are followed by a peppery, berry finish. Food friendly wine, ideal while picnicking al fresco, barbecuing or just sipping on the patio.

Bête Noire

Bête Noire

Cherry Point Wines - bette_frontOur Bête Noire is a cross varietal, cross-vintage blend of our better vintages and a wine representative of soils and climate which are unique to Cherry Point. Pinot Noir 2007, Agria 2009 (the true black beast) and Castell 2009 have been crafted together to create a wine reminiscent of the Rioja region in Spain. Rich red in colour, an earthy nearly dusty aroma introduces the wine followed by plum and spice with a savory oak finish. ThisBête Noire has a great backbone; perfect pairing with steaks and mature cheeses.

2009 Forté

2009 Forté

Cherry Point Wines - forte_2009_frontSweetness: 0
Price: $25.80

Cherry Point Estate Wines premium red wine is made with the best performing Castel, Agria and Zweigelt grapes. Forte is aged in old French oak barrels for 18 months giving the wine a supple velvety texture. This wine is dominated by a cherry aroma, with hints of plum and raspberry. The full-bodied fruity taste is suitable for pairing with all red meat dishes.

2011 Pinot Gris Reserve

2011 Pinot Gris Reserve

Cherry Point Wines - pinot_gris_2011_frontSweetness: 0
Price: $19.75

Pale yellow with a lovely citrus fruit and spicy bouquet, juicy pineapple, mandarin orange and pink grapefruit flavor notes on the palate, with a long honeyed finish; Delightful with poached salmon and white sauce, pasta primavera and crisp shavings of Parmigiano Reggiano from Italy.

2010 Coastal White

2010 Coastal White

Cherry Point Wines - Coastal White 2011Bronze Medal, Northwest Summit Competition.
Sweetness: 1.
Price: $16.95

This Germanic style blend of Pinot Gris, Siegerrebe and Sylvaner has a light straw hue and aromas of honeysuckle and fresh citrus fruit, pear and orange flavor notes are followed by a long crisp finish. Ideal for summer sipping or as an aperitif. Great with seafood, poultry and Asian dishes.

2011 Gewürztraminer

2011 Gewürztraminer

Cherry Point Wines - gewurz_2011_frontBronze Medal, Northwest Summit Competition.
Price: $23.20

This stylish aromatic white has subtle tones of lychee and peach on the nose with floral undertones and a crisp grapefruit finish typical of our terroir.

2011 Ortega

2011 Ortega

Cherry Point Wines - ortega_2011_frontDouble Gold, All Canadian Wine Competition
Silver Medal, North West Summit Competition
Sweetness: 0

This Cherry Point classic is pale straw in colour and displays aromas of grapefruit and apricot with underlying floral notes, typical of the varietal. A full palate of ripe peach lingers with balanced acidity. Pairs well with risotto, pasta and chicken.

Cherry Point Estate Winery – Wine Tour Photos

(click for larger image)

 Cherry Point Estate Winery – Location

The winery is located at 840 Cherry Point Road in Cobble Hill, BC. For more information visit the Cherry Point Estate Winery website and/or follow them on Facebook.