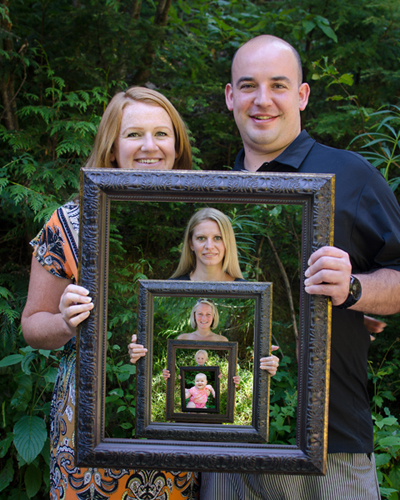
Earlier this summer I was trying to come up with a fun idea as a 40th anniversary gift for our parents. Since they have everything, I thought a generational family portrait, including the grandchildren would be the perfect solution. So, my siblings and I have been working on this idea for the past month, coordinating secret photoshoots behind their backs, hehehe. The final photo turned out awesome and they absolutely LOVED it! We gave them the final print in the same frame that we are all holding in the photos.
To create your generationally layered family photo, first take photos of each person holding the frame you will be using to put the final print in. You don’t need to include an image inside the frame, as you will add these with Photoshop later.
This is what the original images looked like:
Once you have all your photos taken and edited to your preference:
- Open Photoshop and create a path with the pen tool the inside of the frame on each image.
For more info on how to use the pen tool, click here. - Turn your path into a selection by clicking “Load path as a selection” on the Path palette. (If you do not see the Path Palette, go to the Window menu to turn it on.)
- Select the Select menu at the top of your Photoshop window and click Inverse to select everything OUTSIDE of the frame.
- Copy this selection, and then paste it right away into the same window.
- Paste the first photo into the first image BETWEEN the background layer and the new layer (Layer 1) that you just created.
- Use the Free Transform function (Edit menu > Free Transform) to manipulate the size and image location so that it fits perfectly into the framed area.
- Save the image as a jpeg.
- Repeat these steps and paste the new jpeg you just created into the next frame, until you have all your images.
If you have questions, or anything is unclear, please comment below, or send me a message and I’ll be happy to answer any questions.


