Home » Tag Archives: Photo Tips

Tag Archives: Photo Tips

Photography: 10 Composition and Creativity Tips

I’ve shared a whole schwack of photo tips over the past several weeks:

Now that we’ve covered the technical aspects, we will be getting into the fun part with some composition and creativity tips.

In photography, composition and creativity can be about following the rules or breaking them. It’s all about experimenting and trial and error. There is no wrong answer when it comes to being creative, so get out there and start shooting to see where your eye takes you.

10 Composition and Creativity Tips

  1. Create a Project For Yourself – Coming up with shooting ideas can be tough sometimes when you’re running low on inspiration. To get around this, set yourself a project so that you have a focus. If you’re feeling particularly inspired one day, create a list of mini projects and write them on small pieces of paper. Drop them into a jar and pull one out every time you need some inspiration. Check out this article to get yourself started.
  2. Simplicity – Some of the greatest photo compositions are not about what’s in the image, but rather about what has been left out. Look through your viewfinder to see if there is anything you can remove that doesn’t add to your image and adjust your shot to crop it out.
  3. Straight Horizon – Make sure your horizon is level. There’s nothing worse than capturing a great shot but then finding out later that your horizon is totally crooked, sometimes rendering your image unusable.
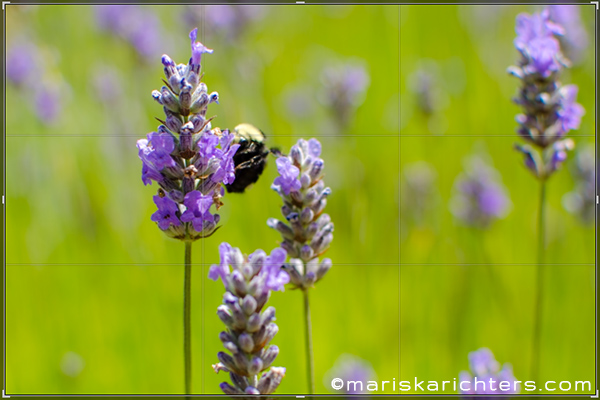
  4. Rule of Thirds – The rule of thirds states than an image is most pleasing when its subjects or regions are composed along imaginary lines which divide the image into thirds — both vertically and horizontally. Position the important elements in your scene along those lines, or at the points where they meet. You can also apply the rule of thirds to existing photos by cropping them later. You’ll find more information on the rule of thirds here.Photography: Rule of Thirds
  5. Fill the Frame – Filling up the frame forces you to keep your background simple and clean. Getting in closer to your subject eliminates distracting elements and cluttered backgrounds that detract from your image. Use a wide aperture to render your background slightly out of focus to make the viewer focus directly on the foreground and subject being presented.
  6. Look For Reflections – Reflections in water or in glass can add symmetry to your image. You can also try to shoot reflections in isolation for more abstract compositions.
    Ucluelet Boat Reflections
  7. Try a Low Viewpoint – Get a more creative view by shooting from ground level for a different perspective on common subjects. For portraits of animals or children, get down to their eye level for a more intimate image.
  8. Try a Panoramic Image – I’m a big fan of the long thin panoramic images. They can add impact to your landscape shots. You don’t need to worry about stitching images together however, you can just take your high resolution image into your image editing software and crop it for the same effect.
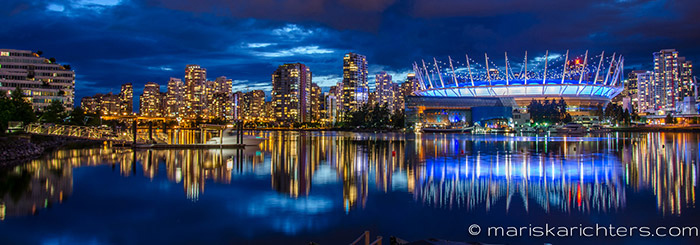
    Vancouver - False Creek Panorama
  9. Shoot in Odd Numbers – Odd numbers give a more balanced composition than even numbers. Try to arrange your shot with an odd number of elements.
  10. Break The Rules!!! – The rules of composition can be helpful when you’re finding your eye and your vision, but they can also be a bit restricting. Once you have the rules down pat, get creative and start breaking them. For example, try putting the horizon at the top or bottom of the frame.

There are many more composition rules and ideas out there, but these should get you started.

Bonus Tip: Try shooting a picture everyday to get yourself into the habit of finding great photographic opportunities. We all have our smartphones with us all the time these days, so use your phone’s camera if you don’t want to lug your DSLR around with you everywhere. Post your daily pics to Instagram and see what people like. This is a great tool to find out what people find aesthetically pleasing. Share your Instagram profile link below so we can follow along and weigh in too!
Do you have any composition tips or tricks to add? Share them in the comments.

Photography: 10 Lighting and Colour Tips

In the past few weeks we have covered camera setup and shoot planningexposure and camera settings, and focusing and sharpness. Today I’ll be sharing some lighting and colour tips to help advance your photography skills even further.

10 Lighting and Colour Tips

  1. Take Advantage of Cloudy Days – You don’t need to wait for a sunny day to go out and shoot. Cloudy days are great for portraits, macro and even some landscape situations. The cloud provide a natural diffuser to the sun’s bright light and help eliminate harsh shadows.
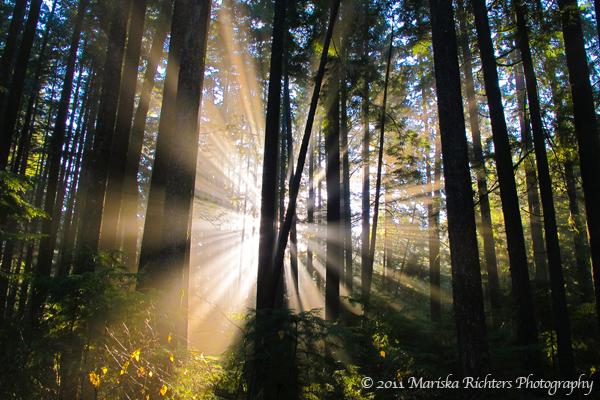
  2. Shoot Into the Light – Don’t always shoot with the sun behind you. Experiment with shooting into the light for some interesting images. Try to position the sun (or light source) behind your subject to help minimize flare.
    Lynn Canyon, Vancouver, Canada - © 2011 Mariska Richters Photography

    Lynn Canyon, Vancouver, Canada – © 2011 Mariska Richters

  3. Shoot at the Golden Hour – The golden hour is one of my favourite times of day for shooting. The golden hour is the period shortly after sunrise or before sunset during which daylight is redder and softer compared to when the sun is higher in the sky. At these times the light is much warmer and you will get much better colour. You will also get some interesting shadows and textures.
  4. Use a Reflector – A reflector can help you fill in shadows by bouncing light back into the darker areas of your image. If you don’t have a proper reflector, you can use anything from a white piece of paper or poster board to a sheet of fabric like a t-shirt.
  5. Experiment With Fill-In Flash – Use your camera’s built-in or external flash to lighten shadows when the sunlight causes dark shadows on your subject.
    [Tweet “Improve your photography with these Lighting and Colour Tips. #photography #PhotoTips”]
  6. Use a Diffuser – The sun can produce some pretty harsh shadows when it’s high in the sky. Experiment with placing a diffuser between the light and the subject to soften shadows.You don’t have to spend big money on an expensive light diffuser, you can easily make one yourself out of a piece of white cloth or paper.
  7. Shoot at Night – Night photography is where I’ve produced some of my favourite images. Experiment using long exposures and other lighting techniques like light trails and painting with light. Be sure to bring a sturdy tripod and remote shutter release to help capture sharp images.
    Granville Street, Vancouver, Canada

    Granville Street, Vancouver, Canada – © 2010 Mariska Richters

  8. Play With Your White Balance – It’s easy to set your camera to automatic white balance, but the auto setting can be fooled in lighting some situations. If you’re shooting in a mixed lighting setting, try shooting a white or grey card and use this to help you learn about and set your custom white balance. Remember that as long as you are shooting in raw file format, you can always adjust the white balance with your software in post-production later.
  9. Shoot at Twilight – Just  before sunrise and just after sunset are great for capturing some moody landscape images. It’s also a good time to catch street scenes and cityscapes while the sky has a bit of light yet you still capture the city lights.
  10. Try Shooting In Black and White – I’ve found that I don’t shoot much black and white since the emergence of digital photography. It was far easier to do when you used a roll of black and white film in your camera. But harsh sunlight can produce strong shadows for some interesting high-contrast back and white images. Try it!

Do you have any colour or lighting tricks to add? Share them in the comments below.

Next week I’ll share Composition and Creativity Tips.

If you found this article useful, please share it with your friends via the social media buttons below.

Photography: 10 Focusing and Sharpness Tips

In the past couple of weeks I’ve shared some photography tips with you relating to camera setup and shoot planning, as well as exposure and camera settings. Today I’ll be covering 10 focusing and sharpness tips to help improve your photography even more.

 Get Tack Sharp Images – 10 Focusing and Sharpness Tips

  1. Nikon DioptreHold the Camera Properly – Hold your elbows close to your body and hold your left hand under the lens. Release the shutter just after you exhale to help hold the camera steady and minimize camera shake.

  2. Focus Your Viewfinder – Most DSLR cameras enable you to adjust your viewfinder for your personal eyesight using the dioptre adjustment dial. Make sure you adjust this to ensure you can see your subjects clearly through your viewfinder.
  3. Set the Right Focus Point – Set your camera to single-point AF mode, rather than letting the camera choose the focus point automatically. You can then position the active point on the subject that you want to be sharp. This is very useful when the main subject is not right in the centre of the frame.
  4. Use Focus Lock – Use this when your subject is not right in the middle of your frame. Position the subject in the middle, focus on it, use the focus lock and then re-frame the shot.
  5. Pre-Focus – If you have a moving subject and can predict where it is going to be, pre-focus on that spot to make capturing a great action shot easier.
    [Tweet “Take sharper photos – 10 Focusing and Sharpness Tips. #Photography”]
  6. Shallow Depth of Field – A shallow depth of field (or wide aperture) to blur the background can make your subject appear sharper than when your whole photo is sharp. However, you should avoid using very small apertures unless you absolutely have to because lenses produce softer results at f/22 than at f/8.
  7. Hyperfocal Focusing – To get the full scene sharp with a wide angle lens, you should focus around one third of the way into the scene with an aperture of f/16.
    Studio-Portrait---Focus-on-the-Eyes
  8. Focus on Eyes – The eyes are usually the most important feature of a portrait, so make sure you focus on eyes of your subject. This is especially important if you’re shooting with a shallow depth of field and wide aperture.
  9. Nikon ML-L3 RemoteUse a Tripod – This is the best way to ensure sharp images, especially when shooting at long shutter speeds. A monopod may be a better option for action shots to minimize camera shake but still move around fairly easily. If you don’t have a tripod or monopod, brace the camera on a solid object like a post or a wall. When all else fails you can kneel or lie down to create a more stable position.
  10. Use a Remote – For long exposures, mount your camera on a tripod and then use a remote shutter release or the self timer to avoid camera shake when you press the shutter release button. (I use the Nikon ML-L3)

What focusing tricks do you use to get super sharp images? Please share in the comments.

Stay tuned next week for lighting and colour tips.

If you found this article useful, please share it with your friends via the social media buttons below.